Friday, September 28, 2018

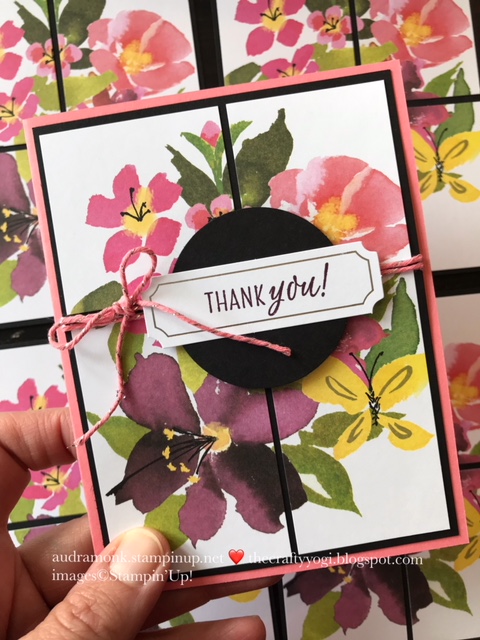
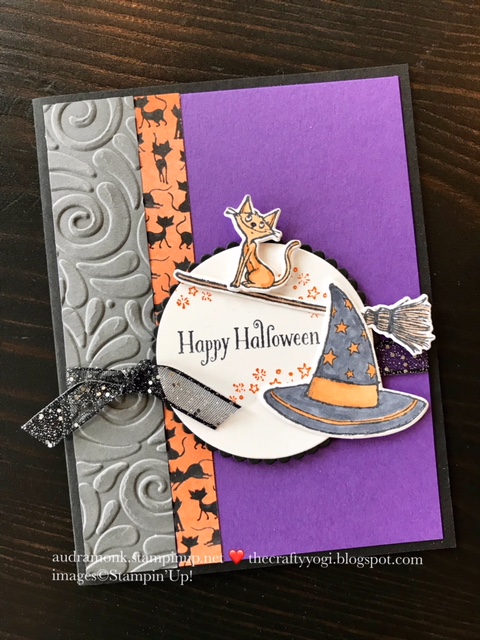
October's Classes to Go

Hi Crafty Friends!

Do you love Halloween? I do! Ok, I love fun and cute Halloween. I can't do really scary. And I love to send Halloween cards to my nieces and nephews and to my grown kids and to friends. Any excuse to send cute cards works for me.

Which brings me to October's Classes to Go. 
RSVP with payment by OCTOBER 7. Email me at audramonk@yahoo.com for payment link. Then I'll place the order and prep the card kits and have them available for pick up/post by the 10th.

Spooky Sweets Bundle


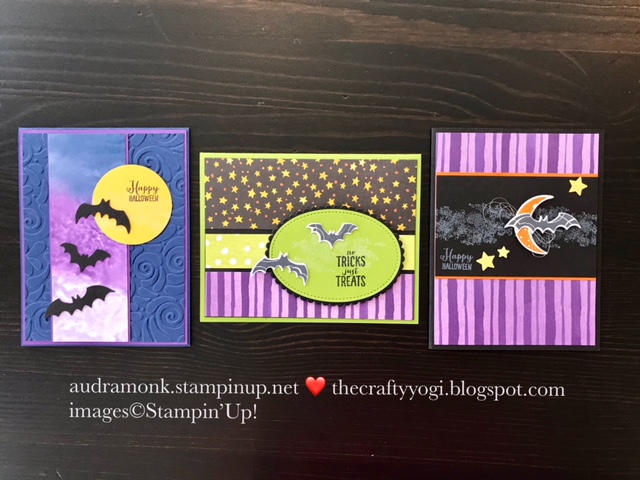
This bundle includes the Spooky Sweet clear mount stamp set and Spooky Bats Punch.

Option 1 $45
Stamp set and punch, PLUS the card kit to create TWO of each card pictured, plus a PDF of assembly instructions and a link to a video tutorial.

Option 2 $20
Already have the set? This option gets you the card kit plus the PDF and video link.

Option 3 $15
On my team? You get a discount! Card kit plus the PDF and video link.

Option 4 $7
Just the PDF and video link.

Local pick up available or shipping is extra.

Cauldron Bubble Bundle


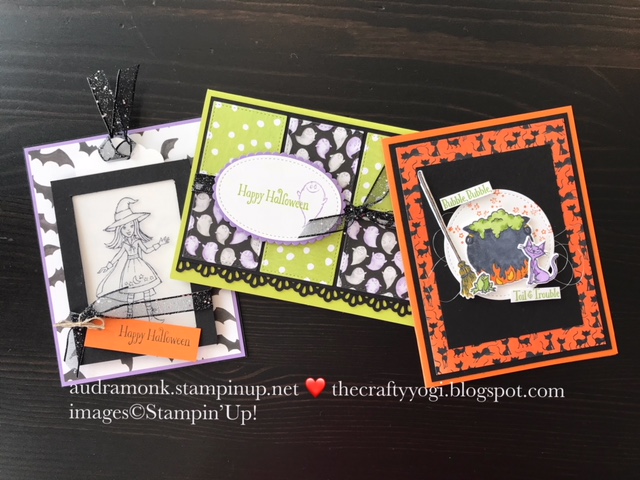
This bundle includes the Cauldron Bubble stamp set and the Cauldron Framelits Dies.

Option 1 $62
Stamp set and dies, PLUS the card kit to create TWO of each card pictured, plus a PDF of assembly instructions and a link to a video tutorial.

Option 2 $20
Already have the set? This option gets you the card kit plus the PDF and video link.

Option 3 $15
On my team? You get a discount! Card kit plus the PDF and video link.

Option 4 $7
Just the PDF and video link.

Local pick up available or shipping is extra.


So, get in your rsvp quick! And I'll send you out your card kit.
Questions? Let me know.

Stay Crafty!
Audra


Thursday, September 27, 2018

Frights and Delights, A Paper Pumpkin Thing Blog Hop

Hi Crafty Friends!
I think this month's Paper Pumpkin is so cute. And I am super happy to be blog hopping with the Paper Pumpkin Thing crew.


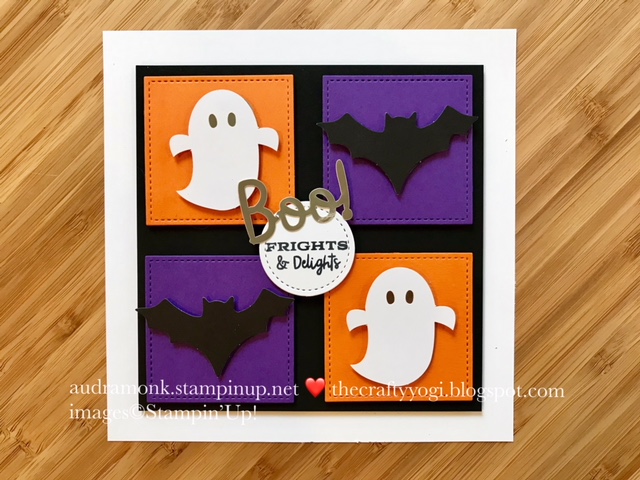
The kit as instructed makes really cute treat packaging. I didn't really need treat packaging so I decided to make them into cards so that I can send them to my nieces and nephews. I've got one made to share with you and I'll get the rest made up next week. 

I've used the pieces from the kit and added the card base and a few layers.


When I was playing with the pieces of the kit, I knew that I had to make a cute little piece of framed art to have out for Halloween decorations. It is adorable!


Seriously, it's so cute! And so easy! I am thinking that it would be even cuter with some little tiny googly eyes on the bats. I'll need to get some from the store and try it out. 


The project is 6" x 6". Here's what it looks like framed up.


Thanks so much for stopping by my blog today. Have lots of fun with your Paper Pumpkin kits!
Want to subscribe to Paper Pumpkin? Click HERE for all the details and if you don't already have a demonstrator, choose me. For more inspiration, click on the names below.


Stay Crafty!
Audra

Sunday, September 23, 2018

So Santa Magic Card with Video Tutorial

Hi Crafty Friends!

I learned how to make a magic card a few weeks ago at a Maryland Stampers Demo meeting. I'm sure this card has been around for awhile, but this was my first time making one and now I want to share the fun. I made a Halloween card and a Christmas card. 

Measurements first, and then the tutorial video and then LOTS of pictures:

Poppy Parade card base: 4 1/4" x 5 1/2" (fold in half)
Whisper White: 4" x 5 1/4"
Santa's Workshop DSP: 3 7/8" x 5 3/8"
Window Sheet: 3" x 4"
Whisper White: 3" x 4"
Poppy Parade "frame": 3 1/8" x 4 1/8" cut at 3/8"

Let's get crafting!


Here's a bunch of pictures to help you out too.


The finished card.


Here are some pics behind the scenes (witch version):


And the finished witch card:


Thanks for checking out my blog. Need supplies? SHOP HERE. 
Questions? Just ask.

Stay Crafty,
Audra


Tuesday, September 11, 2018

A Spooky Fun Halloween Framed Art Sampler

Hi Crafty Friends!
It's framed art sampler time, and I am super happy to share this month's project as I love spooky fun.


I think this project is so fun. I love all the bright colors and fun Halloween elements. I used supplies from our wonderful new Holiday catalog. Click HERE to SHOP. Let's take a closer look at the different elements and then keep scrolling for measurements.


Most of the sampler uses the Toil and Trouble Suite. I love all the fun images and the coordinating dies. I colored everything with our Stampin' Blends.


This little cat on the broom is my favorite part of the project. 
The fun DSP is called Toil and Trouble (just like the suite).


I cut out one of the pumpkins from the DSP here and added the cute little frog.


Do you see the cute little brooms behind the witch hat? So cute!


The spider web is die cut with the Cauldron Framelits and look at the super spooky cute spider. These are our Spider Trinkets, I think they are so fun. And the bats?? I love them! (OK, so I'm loving all the fun Halloween products this year) The bats and moon are in the Spooky Sweets bundle. There's a punch for the bats. The moon uses the Twinkle Builder Punch from the Annual Catalog.


The last element I'm sharing uses the Warm Hearted stamp set. This set is available for discounted purchase for our party hosts. Host a party, in person or online, and purchase this multi-season stamp set with your host dollars. 


Let's talk about the measurements.

The squares:
 DSP, 2" x 2"
Pumpkin Pie, 2 1/4" x 2 1/4"
Granny Apple Green, 2 1/2" x 2 1/2"

The rectangles:
DSP, 2" x 4 3/4"
Pumpkin Pie, 2 1/4" x 5"
Granny Apple Green, 2 1/2" x 5 1/4"
Please note, my measurements are off a little in my finished project so I added an extra layer of green to even things up as I had already attached everything. Which is the magic of creating, making things work. =)

I'm holding this class on Wednesday September 26th at 7pm. Please RSVP by the 24th to attend.
Have questions or need help placing an order, let me know.

Stay Crafty!
Audra


Wednesday, September 5, 2018

ICS Blog Hop, Passion for Punches, Christmas Cards

Hi Crafty Friends!
Welcome to September and to the ICS Blog Hop.
Tonight it's all about the PUNCHES!


I am so excited about all the punches in our new Holiday Catalog, that I decided to feature them in this month's Christmas Card Class.


How cool is this? Three cards and not a die in sight! Let's take a closer look.


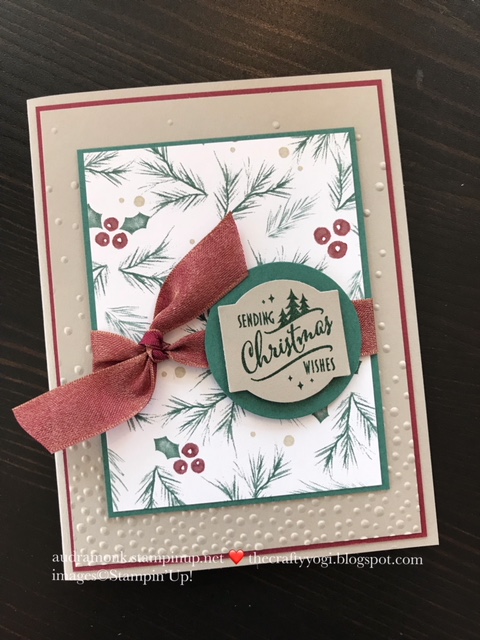
My number one favorite punch is the in the Christmas Traditions Punch Box. This is such a cool kit! Stamps, ink, and a super cute punch. Add some lovely DSP ( Joyous Noel) and the poshest ribbon ever (Merry Merlot & Copper 5/8" Reversible Ribbon) and you have a quick and lovely card.


You must buy this Christmas Bulb Punch! It's so fun! And really, really easy. The only stamping on this card is the sentiment. I punched the lights from card stock and the end of the lights from Silver Foil paper. The sentiment comes from the coordinating stamp set, Making Christmas Bright.


Another punch getting lots of use from me is the Sprig Punch. I love it. It punches a two sprigged sprig (?!) which can easily be snipped apart for fun layering.  All the stamping for this card is from the Feathers and Frost set.

Hmmm...If you haven't noticed yet, I am really enjoying all the new punches we have. And I'm super excited to share them with my crafty friends in class next week.


Thank you so very much for checking out my blog post! The ICS team has lots to share with you! Click HERE or the next button below to see what Terri has to share.


If you don't have a demonstrator yet and need a catalog, want to attend a class, or place an order? Contact me, audramonk@yahoo.com.

Stay Crafty!
Audra


Thursday, August 30, 2018

It's A Paper Pumpkin Thing, Blissful Blooms Thank- Yous

Hi Crafty Friends!

It's time for A Paper Pumpkin Thing Blog Hop. This month's kit featured some beautiful pre-printed watercolored cards. It's a pretty simple kit, and I had lots of fun playing with it.


I made this really neat card.


It's so cool how just cutting apart the card and then mounting it on some black card stock can be. I got really excited to make more. I am planning to send them to my Paper Pumpkin subscribers to say "thanks for subscribing with me".

I added a Flirty Flamingo card base to contrast and complement the Basic Black background and the pre-printed card.


I was having such fun making them (I mean really! Aren't they lovely?) and then I realized that for this blog hop we're supposed to have a non-card project too! So I checked my box and I was down to just 2 cards! (I used some of the other cards for a tutorial). So, I decided to make some sort of cute little box. I saw one in our demo group that could hold some tea bags or other small treats, and I decided to give it a try. I used a tutorial by Sandra Ronald, at artypapercrafters.com. 
It's such a cute and sturdy box!


I had enough printed paper to cover the front, back, and top. I stamped the sides with the flower stamp from the kit in Blackberry Bliss.


This would be such a great set to give. Or the boxes would be awesome for a shower thank you gift. And now check out what I made with my very last card from the kit (as I needed more thank you cards to send).


Thanks so much for checking out my blog today. 

September's kit is going to be full of spooky fun. If you like treat giving, you should subscribe here, https://www.paperpumpkin.com/ by Sept 10 and choose me as your demo (if you don't have one already).


For more inspiration, click on the names below.

Stay Crafty!
Audra


Monday, August 20, 2018

Stampin' Up! Display Stamper Post

Hi Crafty Friends!

Today I'm sharing a variety of projects. I'm posting them as part of my application to be a Display Stamper at the upcoming Stampin' Up! On Stage event. Attending the On Stage events are one of the percs of being a demonstrator (want to know more about that? Contact me for more info). 

On Stage is a gathering of demos with presentations from the home office as well as from other demonstrators. It's a time filled with inspiration and meeting with new and old stampin' friends. And I'm hoping to be part of the inspiration! Display Stampers receive a sampling of totally new product and are asked to create projects to share on display boards at the event. I was chosen a few years ago and it was very challenging but very fun. I'm hoping to get chose again. (Pick me Stampin' Up!)
So wish me luck and let me show you some things I've been working on.

I'm most excited about my Framed Art Sampler. We'll be making this one in class at the end of November so that we can display it all of December. Don't worry, I'll do a more detailed post about it soon. This is the first project I made with my new Holiday catalog products. I was very much inspired by the beautiful ideas in the catalog.


I love the magical Christmas feeling of this piece. Here's what it looks like framed up.


**Update** Want all the info on how to make the sampler? Click HERE to go to the blog post.

We have another Home Decor class coming up the beginning of September, our HOME frame. It's a follow up to the first class we did back in the spring. We're making more "0"s to go in our frame. 


It's such a fun project and I love changing out my "O" every month. Please note, this was not my original design. I learned it from another demo, but I've had such fun coming up with ideas for the "O"s. This class is on Sept 5, so get you RSVP in quick! If you missed the first class and need to make the whole project, that's no problem as that option is available too. 
Here's a closer look at the 'O"s.


This next pic shows how lovely they look in the frame. We'll also make a Valentine's one, I'm waiting on a stamp set to arrive so that I can design that one.


Now, let me show you a few cards.

We made this sweet card in my classes this past week. It features the Pop of Petals bundle (so cute!) and the Stitched Labels Framelits. 
My next two cards use new products from our soon to be shop-able Holiday Catalog. 
Need one? Just ask!


I adore fun spooky Halloween stuff! I had lots of fun making this card. It will be one of the make and take options at my Open House on September 9th. This new set is called Cauldron Bubble. I love this saucy little cat. Here's a closer look:


My last card share is this fun and quick Christmas card. It uses a stamp and the punch from the Christmas Traditions Punch Box. And the new Sprig Punch. 
We'll be making a variation of this at my Open House.  


Last up, I'm sharing a scrapbook page.  I love scrapbooking. I love being able to look at and share my pictures. (Really! We must not leave our pictures trapped in our phones) And I've got plans to offer a scrapbooking class or club soon. So keep your eye out for that. I love pocket scrapbooking and using our Memories and More cards packs. I also like a more traditional scrapbook page. For this page, which focuses on just one picture, was made using supplies and stamps from one of our Paper Pumpkin kits. 
I'm planning to use this page for my son's birthday coming up in December.


Thanks so much for checking out my blog today. I shared a wide variety of projects. If you need  more detailed information, let me know. 
The 2018 Holiday Catalog will be available for ordering on Sept 5.

Stay Crafty!
Audra