Friday, July 29, 2016

Crafty Organization, a New Desk!

Hi crafty friends!

For many of us crafting is something we love to do. If we're not crafting, we're thinking about crafting. Or we're thinking about crafting supplies, the ones we have and the ones we need. Or we're thinking about how to organize said crafting supplies!

I thought you might like to see the newest addition to my crafting collection, my super awesome organization stamp desk, also know as the roll top desk from stamp n storage.


I live in an open floor plan townhouse. I've set up my craft area, which I call my crafty corner, in the back corner of the main level near the dining area (which I use for classes and of course, dining). I had a decent set up from the Martha Stewart collection from Home Decorators that I brought with me when we moved. The old desk fit the space the same, but it often looked like this:
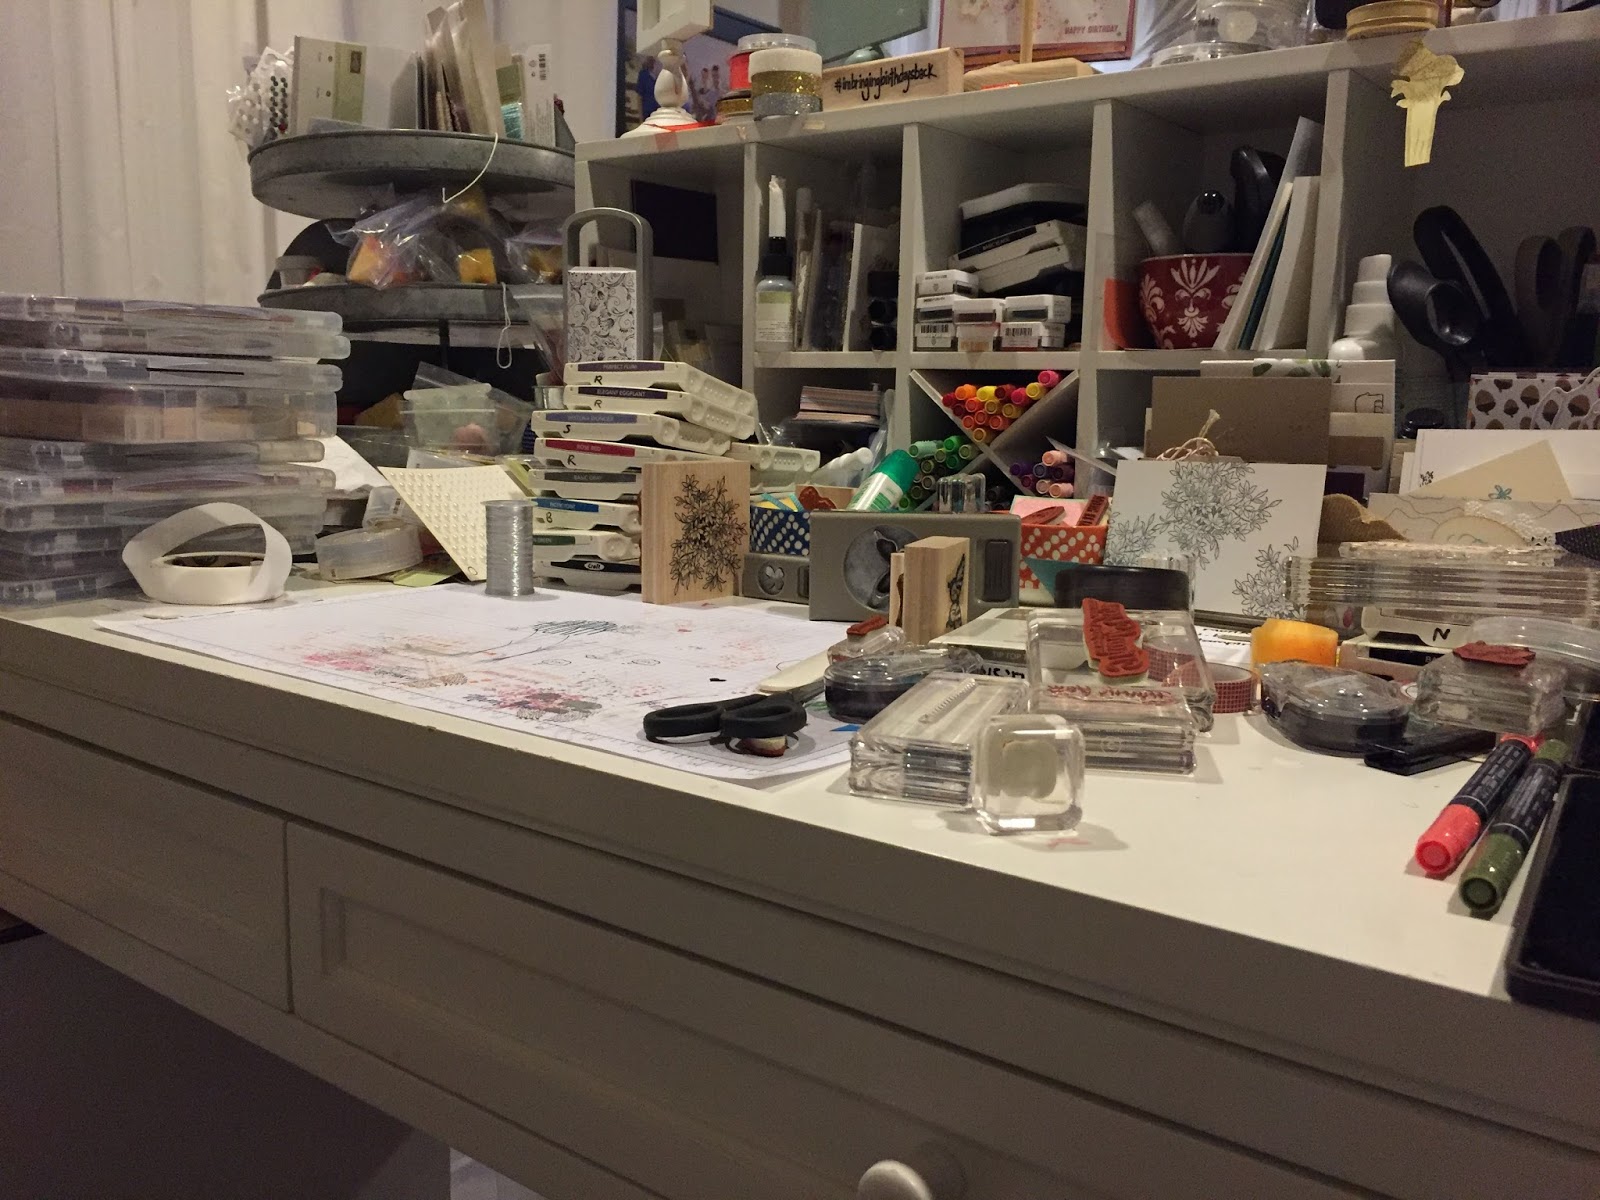

Or somewhat more frequently than I liked, like this:


I had seen the roll top desk on stampnstorage.com, and was pretty sure it would be perfect for my needs. I prefer to face out into the room when I work, so I can interact with my family and look out the windows. Also, the walls in my corner are filled with book shelves, containing books and craft supplies.
The desk is a big ticket item, so I had to wait a bit. I also investigated getting the desk made to 36" height as I like to stand when I stamp, which, with some extra money and time, they could do!! Finally, I ordered, and waited, and the desk arrived!


415 pounds of awesome! We had to deconstruct it a bit to get it in place. And I totally feel it was worth it (my husband and boys may feel differently).

As with all craft organization, it's a work in process. But this is how I have it arranged for now. I have found that I am putting things away as I go...so, I'll keep you posted.

Organization in process.

Ahh...the desk top, look at all of that space!
Ribbon, ink pads, and markers.

The left drawers:

Block storage, die cuts, paper pumpkin stamps, stamp a majig, embossing brush, and enamel shapes.


Envelopes, twine, and glue. Plus pre cut white and vanilla card bases.


Retired washi, extra ribbon, heat tool, and sponges.
The bottom drawer (not pictured) has 8 1/2x 11 files. But I'm not planning to use them, I think.

The right drawers:


Ink refills, adhesives, and scissors.


Check this out!! Punch storage. Awesome!


Embossing powders.


This drawer, I love. 12 x 12 paper storage.

The center drawer:


Current washi, metallic thread, big scissors, hole punches, label maker.

I hope you enjoyed a quick trip around my craft space. I'll let you know how it goes.


Just a last photo with my best helper.

Stay Crafty!
Audra


Sunday, July 17, 2016

A Waterfall of Wonderful, Remarkable Blog Hop


Welcome to this months Remarkable Blog Hop!


I'm so excited! You ever have ideas in your head and they swim around and turn this way and that and you're like aha! But then you wonder will it work? All of that happened in making this card, but the exciting thing is it worked! On the first try even.

I don't make too many wow cards, but I saw a beautiful card from Sue Vine using the Falling Flowers stamps and coordinating May Flowers Framelits, and I wanted to make something similar. It was a waterfall card, which just a few months ago, I had watched a tutorial from Patty Bennet on how to make one, I'd even cut out four, but I had not done anything with them. So after letting the card brew in my head for a bit, I was ready to get to work.


Isn't it lovely? I used the Fruit Stand DSP for color inspiration. Flirty Flamingo is the card base, it's a 1/4 sheet (5 1/2 x 4 1/4). The flowers are Flirty Flamingo, Peekaboo Peach, Daffodil Delight, and Tangerine Tango. The leaves are stamped in Pear Pizzazz and Cucumber Crush.

Let's talk about the flowers first. I stamped them in Versa Mark ink and embossed them in white.


Now, for success with lining them up with the framelits and so you don't drive yourself crazy, use the handy dandy tabs that Stampin' Up put there for us.


So when I stamped all the flowers, I stamped them all with the tab at the top (even though it's pretty hard to see them when stamping with the Versa Mark). Just look at your stamp and keep the tab at the top. After they are stamped and embossed, get out your daubers or sponges, and in a quick moment, you'll have some beautiful flowers!


I mean really, it's so fast! Then get them over to your Big Shot and in a few goes, you have a bouquet.


See, this is where the whole pointy tab thing is really important.

Here's a close up of the flowers, so pretty.


To make the tri-fold or waterfall card base, I used a piece of 12 x 12 Whisper White card stock. You score it at 8 inches and 4 inches. Then turn 90 degrees and cut in half at 6 inches. Then at the top and bottom, make a tiny pencil mark 1 inch in. You cut on the diagonal on your Stampin' Trimmer, and voila! You have 4 cards!

To keep things somewhat simple, I stamped the leaves and the greeting right on the white card stock.


Open it up to do this! For the middle section, you need to flip it over.

Then I mounted the card on the card base with some Fast Fuse. I placed my flowers to get an idea of where I wanted them, then I attached them with Glue Dots.


Here's the card open:


So, good luck making one! We'll be making this card in my class today, I hope it goes well and that they love it. Here's a pic of all the cards we're making today.


Have fun and stay crafty!
Audra


Wednesday, June 29, 2016

Long Distance Love, Sending Cards

I have 8 young nieces and nephews, and 6 of them live pretty far away from me. I like to send them cards for their birthdays and holidays for many reasons. One, since I don't often get to see them, I want them to know who I am and that I care about them. Two, I like to make cards and having people to send them to makes a card maker happy. And three, who, young or not so young doesn't like getting mail? I mean, I'm a bit excited about getting the mail every day, even though it's usually catalogs and bills! But you never know, there might be something good in there one day.

I was feeling a bit bad about not sending anything since Easter to my littles. I was going to just send cards for no reason, but then I decided, 4th of July cards!

So here's what I came up with, cards with bears and cards with boats.


Aren't they cute? I used one of our new in colors, Dapper Denim and our returning in color, Watermelon Wonder. 

Here's a close up of each card:


This card features the Baby Bear stamp set. Triple stamping in three colors make him look so life like.

Here's the next card:


This card uses the Swirly Bird bundle.


This set is so versatile! I've only just begun to explore the creative options with this set.

Here's the same card, just a bit changed up.


Alrighty then, as my cards are all ready, I'll put them in the mail and they'll make their way across the country into some mailboxes and into the small hands of my littles. I hope this has inspired you a bit to make some cards and send them out and about.

Stay Crafty!


Wednesday, June 22, 2016

Cards in the Mail Class

Hi everyone, I've had a few requests for a cards in the mail class from those who don't live near me. So I thought I should give it a try. Here's how it will work (I may tweak it as we go).

What you do:
Opt in, let me know by email audramonk@yahoo.com that you are in for the month.
Order, by the 10th of the month, a minimum of $40 Stampin’ Up! products online through my web site audramonk.stampinup.net using the hostess code I email to you, and I'll post it on my Facebook page too: https://www.facebook.com/TheCraftyYogicards/

When you order online, our products will be shipped right to you.

What you get:
Supplies to make 5 exclusive cards. I won’t be making them in any other class. They’ll feature one main stamp set. And usually no more than 3 colors of ink (plus black).
Everything will be prepped; you just stamp and put them together.
When you opt in, I’ll let you know some basic supplies you might want to order if you don’t already have them.
You’ll get a PDF with a photo of each card and basic directions.
You’ll also get YouTube links to videos showing how to assemble the cards, and I might do some Periscope live videos so we can interact as we assemble the cards.
I’ll mail your card supplies by the 25th of the month (if you’re local, I might drop them off).
I’ll post the sneak peek pics and featured stamp set by the 5th of the month, here on my blog and on my Facebook page.

Since this is the first go with this, I'm posting them early! I hope you like them, as I think they're pretty awesome. Awesomely Artistic, that is!  In case you didn't know, that's the name of the stamp set.


July Cards in the Mail Class


So, let me know you're in, place your order and let's get crafty!
Audra


Thursday, June 16, 2016

A Beachy Birthday Card

Happy Summer Crafty Friends!

Today's post is a card I made for my best friend's upcoming birthday. She lives near the beach and loves all things beachy. I love beachy things too, and in fact in the past month or so, I've made several cards that I though were for her, but then, the new Stampin' Up! annual catalog arrived...

Let's start at the end with the card as I just can't wait to share it (and I know that's what you're here for anyway).


Isn't it super cute? I bet you feel like you're on vacation just looking at it. So, let's talk about the creative magic that happened.


Let me introduce you to the Serene Scenery DSP Stack.


#141624
Absolutely lovely. One side has a photo real nature image and the other a graphic design. The colors are divine. Bermuda Bay, Crumb Cake, Delightful Dijon, Island Indigo, Old Olive, Pool Party, and Whisper White. I mean, really, three of the names have to do with beachy things!

The choice of images was inspired by my friend, she is a volunteer with a turtle rescue group in her area. She stays up all night, keeping an eye on a turtle nest, so if they should hatch, she can help them make it safely into the sea. So, I thought to pair one of these lovely papers and the turtle from the From Land to Sea stamp set.


I colored this cute little guy using my blender pens and Garden Green ink. I stamped him in Early Espresso ink on Shimmery White paper.
Here's the stamp set, lots of fun beachy images.


#139361

For design inspiration, I checked out a few sketch challenges and went with this one from The Paper Craft Crew:

You can find their challenges here:

Let's take another look at my card, you'll see that I changed up the sketch, but the basic idea is there.


I hope I've inspired you a little. 
Stay Crafty!


Thursday, June 9, 2016

Somethings New from SU, Remarkable Blog Hop

Hello crafty friends!

Guess what? This is my 100th blog post! I think we should celebrate. It's fiesta time! I will send the first 3 people who comment on this blog post (sorry, not my fellow Remarkables) one of these cute llama cards. Cool deal, yes?

On today's Remarkable blog hop, I am show casing the Festive Birthday Product Suite. Can we just say llamas? Super cute. Have a look at these cards!


I told you, isn't he the cutest? Let's take a look at each card individually.


This card is pretty much a case of the one in the catalog. Which I always think is a great way to start creating. I used the DSP to give me a starting point for colors. Crushed Curry, Melon Mambo, Tempting Turquoise, Pumpkin Pie, and the new Emerald Envy.


Here Emerald Envy is partnered with Chocolate Chip.


Don't you just love the cactuses?  I had fun coloring the sentiment with SU's wonderful markers. Here's a close up:


So if this suite wasn't on your shopping list, I think you should definitely add it. I can see lots of fun ahead! Who doesn't love a fiesta? Now I need some chips and salsa!

Thanks for visiting and Stay Crafty!


Here's the whole list.

Nancy Amato -http://stampinallnight.blogspot.com/2016/06/who-doesnt-love-new-stamps-remarkable.html

Melissa Bolinger - http://creativeblessingsbymissy.blogspot.com/2016/06/remarkable-blog-tour-new-new-new.html

Tamra Davis - http://www.theCardLadies.com/remarkable-blog-hop-oh-so-much-fun-to-just-play/
Connie Deibler-http://www.conniestamps.com/2016/06/whats-new.html 


Tracie Evans Langley --
http://www.stampinup.net/esuite/home/traciesallaboutstamping/blog?directBlogUrl=/blog/86481/entry/remarkable_stampers_june_blog_tour


Anne Matasci- http://wp.me/pCcBw-28j

Heather Mathieson - https://inkyladybug.wordpress.com/2016/06/09/june-remarkables-blog-tour


Audra Monk - http://thecraftyyogi.blogspot.com/2016/06/somethings-new-from-su-remarkable-blog.html

Maria Pane -http://stampinandscrappinwithriri.blogspot.com/2016/06/remarkable-stampers-blog-tour-june-time.html

Michele Reynolds -  http://inspirationink.typepad.com/inspiration-ink/2016/06/june-blog-tour.html 


Janet Wakeland- http://wp.me/pHIQD-akn