Tuesday, May 30, 2017

New! Color Theory Club

Hi Crafty Friends!

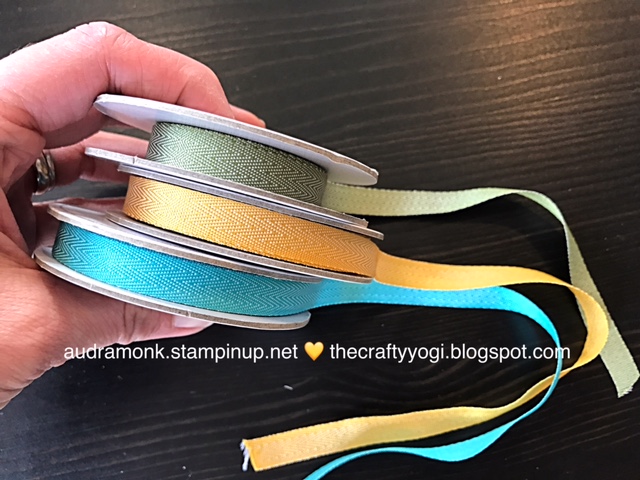
I'm so excited! The new Stampin' Up catalog goes live in less than 2 days!! There is so much new wonderful stuff, it's gonna be hard to narrow down my list. One thing I know, is that there will be lots of items from the Color Theory Suite on it. I love the suite so much, that I've decided to center a new class around it. If you have a catalog, open it up to page 147. Need a catalog, let me know.

In this class, we'll make 4 projects AND each participant will go home with a totally awesome goodie bag of product to use at home. It's a win win! Something to use in class and something to use at home. The class will be offered every other month, and feature the upcoming season. If you attend all 4, there's a bonus! This class is also available as a to go option (additional fee for shipping). The class fee is $30 ($25 for demonstrators).

For June, it's all about summer! Here's what we're making this month:

Aren't they lovely? 

Here's a closer look at each one:

This cutie, is a CASE from the catalog.

I love these Adirondack chairs.

This card just says "relax, it's summer" to me.

And, I think this one might be my favorite...

Thanks so much for stopping by to take a look. Registration for June's class is due by tomorrow, May 31. Look for updates on August's class mid July. As always, if I can help you in any way on your crafty journey, let me know. You can reach me by email at audramonk@yahoo.com.

Stay Crafty!


Monday, May 29, 2017

New Catalog Ribbon Share


Do you love ribbons? I do! They add texture and often a little pop of color to a project. They're also so tactile, they feel so nice to touch.

This card features the new in color, Berry Burst.


This year's catalog has a ton of amazing new ribbon! If you were to buy 1 roll of each, it would cost $398.05!! Most of us aren't prepared to do that (if you are, let me know!). 

So, I'm offering my first ever Ribbon Share.

I've come up with several options, each share of ribbon is 2 yards, and will be packaged neatly in a cello bag. Each order will include a small gift. You can purchase more than 1 share.
This is a prepay program.
Payment for round 1 is due May 31st. This is the quickest way to get your hands on the new ribbon!
I will offer a second round at my Open House on June 11.

Cash, check, or Paypal (to audramonk@yahoo.com). If you want it mailed, there will be a postage fee. To reserve your share, email me at audramonk@yahoo.com, I'll email you a total and if you like, a Paypal invoice (it's quick and easy to make an account and you can use a credit card).
Are you a demo? It's a 20% discount!

I want it all! $79.61 2 yards of each new ribbon from the options below.
Everything but the In Colors, $64.13.
Both In Colors, $15.48
2017-2019 In Color Ribbon, $7.74.
2016-2017 In Color Ribbon, $7.74.
Fancy Ribbon, 6 kinds (the ribbons with stitching, special edges, etc) $32.36.
Regular Ribbon, 6 kinds, $34.29.

The new 2017-2019 In Color Ribbon

The new 3/8" Mini Chevron Ribbon

Contact me ASAP! We're doing this ribbon share in sets of 5. Want a little more? You can do more than one share. Cool, huh? Questions? Contact me, audramonk@yahoo.com

Stay Crafty!
(and use ribbon!)


Friday, May 26, 2017

Lift Me Up Framed Art Sampler

Hi Crafty Friends!

I am so excited to share my second framed art sampler. I've started a monthly class where we get together to make a seasonal sampler. I'm enjoying stretching my creative energies to some home decor projects.

This month, May, we're on the cusp of summer and I thought it would be fun to play with the lift me up bundle. Many years ago, for one of our anniversaries, my husband and I went for a hot air balloon ride. It was magical! It feels like you're floating...which, I guess you are. If you have the chance, you should do it!

And my next biggest inspiration was the retiring Cupcakes and Carousel Designer Paper Stack (which is marked down and available till May 31, as supplies last). I've also used the Cupcakes and Carousels Embellishment kit.

The paper is so beautiful, a bit vintage, and the colors...

Listen to this list of colors: So Saffron, Calypso Coral, Bermuda Bay, Peekaboo Peach, Early Expresso, and Very Vanilla. All so lovely and cheery.

For basic measurements, you can check out this Blog Post. For this project, I added an extra layer of DSP, 1/4" bigger to each square. If you need more info than that, just let me know and I'd be happy to help.

Now, let me share all the beautiful pictures, enjoy.


And here's what the project looks like framed:


I just love it when I can make something that makes me happy. and to let you know, it wasn't all that easy. The ideas had been rattling around in my head for awhile but on my work day, it was a bit of work. The cool thing about a sampler is you can focus on each small section and then how they go together. Anyhow, I'm pleased. I hope I've inspired you to create something similar! 

I do have a limited number of to go kits available for this project for $20 (no frame, add frame for $10 more) plus shipping. The kits include all of the paper and embellishments, but not the stamps, ink, or adhesives (however these can be added). 

Stay Crafty!


Thursday, May 25, 2017

A Paper Pumpkin Thing, May


Hi Crafty Friends!
This month I am hopping along with a bunch of lovely Stampin' Up demos sharing alternative projects for the May Paper Pumpkin kit. I love this kit! Did I tell you how much I love this month's kit? It's so cute and pretty versatile.

My project stays pretty true to the donut theme. I had a fun time making a pile of donuts.


I cut the donut shaped cards in half to make the donuts, then I cut the pink donuts in half to make the bottom layer of donuts. Pretty cool, yes? The other fun thing I did was cut the bit of chocolate icing that I removed from the center of the donut into pieces to make sprinkles that I could stick onto the sentiment banner.

Thanks so much for stopping by. Click HERE to be inspired by Cathy Caines. Or click the next button below.


Tuesday, May 16, 2017

Introducing Fresh Fig, Swap Card

Hi Crafty Friends!
Today I have a quick share for you. As you might already know, Stampin' Up has a new catalog coming out and I wanted to share a little of the new stuff with you. One of the ways demos can get ideas is by sharing, and one way demos share is by participating in swaps. I'm participating in a mail in swap. I'll be mailing my contribution out tomorrow and next week, I'll get an envelope in the mail with a bunch of awesome cards in it! Pretty cool.

So today, let me introduce you to one of our new in colors, Fresh Fig (you may have seen this beautiful color a few posts ago on the ICS blog hop). It's such a rich, lovely color. I though it would be just right for a wedding card. The Eastern Palace DSP had just the right piece of paper for my card. (By the way, these two items are available early in special bundles, contact me for more info or click the shop now button). The flowers are from a new stamp set called Wood Words, and the sentiment is from the Banners for You set, which is carrying over.


As you can see, I love to play with layers of paper. 
Here is my formula:

Fresh Fig Wedding Card Paper Sizes
in inches:

Very Vanilla: 5 1/8 x 3 7/8
Eastern Palace DSP: 5 x 3 3/4 
Very Vanilla: 4 x 2 1/2 
Fresh Fig: 3 7/8 x 2 3/8
Very Vanilla (stamped piece): 3 3/4 x 2 1/4 

It's also fun to see a bunch of the same cards!


Now to pack them up and get them in the mail.
Stay Crafty!


Friday, May 12, 2017

Cards By the Seashore 2017

Hi Crafty Friends!

I'm having a Cards By the Seashore Just Cards Class next week. I'm offering it on two days, and they are both sold out! Wow! That tells me that lots of card makers love the beach. I love the beach, in fact, I'm pretty excited as I just booked a beach house in Lewes, Delaware for a week this summer. Lewes is one of my favorite places...but I digress, let's talk about the cards!

This set of cards features a wide variety of styles and stamp sets. I'm using soon to be retiring sets, (better order them quick, they're only available until May 31) a carrying over set, and an incoming set. Here's the whole line up. Ahhh...feels just like a day at the beach.


Let's take a closer look.

Lots of bright colors with this card! Day at the Beach stamp set and Festive Birthday DSP.


Here's a bold patriotic card. I've made it for Father's Day, but it would also make a great birthday card. Stamp sets: From Land to Sea, Thoughtful Banners, and a little Gorgeous Grunge (boy will I miss that set!). The DSP is Floral Boutique.


I did some embossing in white on this card. The stamp set is Wetlands. The ribbon is a new one! There are so many lovely new ribbons in the new catalog, I can't wait till June 1.


This cutie uses the stamp set Seaside Shore and the coordinating DSP. The DSP is retiring, but the stamp set is carrying over into the new catalog.

Here is the final card, it's using a new stamp set called Colorful Seasons and the coordinating thinlits. This set is amazing! I'm adding a new class centered around the whole product suite. Stay tuned for more details. I've included a video on how to stamp the background, in which I used the High Tide stamp set. It is carrying over!


Isn't it lovely!

Here's the video:


I've started cutting paper for class, I love piles of freshly cut paper.


And to finish us off, here's some pictures of the beach! We stopped by Carolina Beach in North Carolina while visiting family last weekend. It was pretty chilly, but still lovely to see the ocean.


Thanks for checking out my beachy cards. 
Stay Crafty!
Audra


Tuesday, May 9, 2017

Flip Book Fun

Hi Crafty Friends!

Today we make a flip book. I have lots of pics and a video to help you figure it all out. I found the basic idea on Pinterest, on a blog called Bella Blvd with a post by Katherine McElvain. She had a great photo tutorial on how to make the book. I made a video so that you can follow along and make it with me.

This is such a great way to show off some favorite pics to your friends and family. Seriously, get your pics off your phone! Here is my travel themed book.


Your cutting instructions are here:

Got everything? OK, let's get started.


Pretty cool, yes?
Here's a few pics from this book.


And here is the video flip through for the travel book:


Thank you so much for stopping by, I hope that you are inspired to make a flip book and fill it with pictures. If you have questions, let me know.

Stay Crafty!
Audra


Friday, May 5, 2017

Framed Art Sampler, Featuring Oh, So Succulent


Oh, what a wonderful set of stamps and dies from Stampin' Up. I've added a new class to my schedule, (at the request of one of my lovely team members). A Home Decor class, featuring a Framed Art Sampler. This was my first time making one. So after a little looking around on Pinterest and such, this is the formula I came up with. 
The whole project is based on using a 9" x 9" RIBBA frame from IKEA. It's a shadow box frame, so your elements can be 3D.


There are three basic steps to the project: the layout, the succulent flowers, and the stamping and die cutting. So we'll go in that order. I'll describe the colors and elements as used in my project. But you can get as creative as you like. Check back next month as I'll post a new project.

The Layout:


1-9" x 9" piece of Designer Series Paper (DSP) (or card stock)
1-8" x 8" piece of Whisper White card stock
1-4 3/4" x 4 3/4" piece of Tip Top Taupe card stock
1-4 1/2" x 4 1/2" piece of Mint Macron card stock
1-4" x 4" piece of DSP
5-2 1/4" x 2 1/4" pieces of Tip Top Taupe card stock
5- 2"x 2" piece of DSP
1-2 1/4" x 1 1/4" Whisper White card stock (for sentiment)
1-2 2/8" x 1 2/8" Mint Macron card stock


I snailed the individual pieces together, then I adhered them to the Whisper White with our Tombo liquid adhesive. Using the liquid glue gives you a few seconds to straighten things.

The Succulent Flowers


Check out this blog post to see how I die cut and sponged the succulents. For this project, I made three: Mint Macron, Old Olive, and Sweet Sugarplum. I used a 5 1/2" x 4 1/4" piece of card stock in each color. I sponged the Mint and Olive pieces with Pear Piazzaz, Crumb Cake, and the tips with Rich Razzleberry. I sponged the Sugarplum pieces with Crumb Cake and the tips with Rich Razzleberry.


The Stamping and Die Cutting

Using the piece of Whisper White left over when you cut down the 11" x 8 1/2" piece of card stock to 8" x 8", stamp all your images, leaving space between them to allow for die cutting. The Oh, So Succulent stamp set is a two step stamping set. This same post has a short video on how to two step stamp these images. I also used one of the jars from The Jar of Love stamp set.


Die cut everything out with your big shot. It will take a few goes.


Assemble your elements. I also used the basket from the Bunny Builder framelits. I used Tombo for the succulent flowers and glue dots for attaching all of the little succulents to their jars and baskets.


With a little play, you'll have a beautiful piece of art to gift or use for yourself.


Have fun and stay crafty!


Wednesday, May 3, 2017

ICS Blog Hop, All Things Feminine


Hi crafty friends! Welcome to the first Wednesday of the month. That means it's ICS blog hop time! This month we're all sharing a girly project. I wasn't really sure what I wanted to create and share and then I looked at my new Eastern Palace bundle and light bulbs started flashing.

Stampin' Up has a pre-catalog release set of bundles featuring new stamps, new framelits, new colors, AND you can purchase them now. When thinking of making something feminine, I was really drawn to the new in-color, Fresh Fig. And then I thought of how lovely it would be with Sweet Sugar Plum. Then after a little experimentation with the framelits, all sorts of pretty and fun things started happening. Now, remember, I usually make pretty, but simple cards. So it was fun to make an extravagant, and (I think) lovely card.


Let me know what you think! 
Stay Crafty!

For more inspiration, click HERE  or the icon below to be inspired by Cheryl.